Welcome back! If you’re still with us after reading part 1, you are a most curious soul. I mean, how could you not be to withstand so much of my boring writing in the name of woodworking?!
So now the sole of the plane is flat. I would have to say that 80 percent of your grunt work here is done…..but there are a few other crucial things left to accomplish. If the bottom of our plane is flat, we need to ensure that the rest of that translates all the way up to the plane iron, because what have we really accomplished if we stop here? Flattening and truing the Frog isn’t JUST to make it parallel to the sole, it also ensures we have a mating surface for the blade to rest on the whole time the plane is in operation. When this surface is not flat, we get that ever so annoying movement named “chatter”. As the plane iron skims across the wood substrate, it will unseat itself and bounce around on the surface of the frog, causing an inconsistent cut.
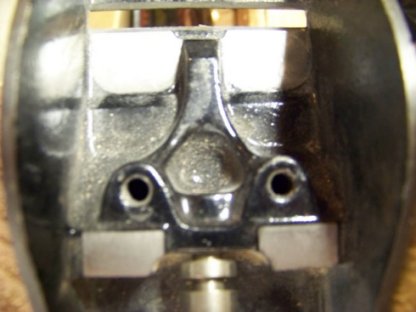
With all of that in mind, let’s look at the Frog of our test subject, the Stanley #4:
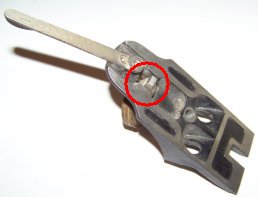
To disassemble our frog from the sole, there are two screws that hold it to the sole which need to be taken out. From there, removal of the frog is easy. We also need to push the pin out that anchors the blade fine adjustment screw lever to the frog (see circled item in above photo). I used a thin punch, and it easily came apart. One thing we ARE NOT removing here is the blade pivot lever that is used to pivot the blade left or right for cut adjustment. It is riveted to the body of the frog. Extra care will be used to avoid this part in the next step.
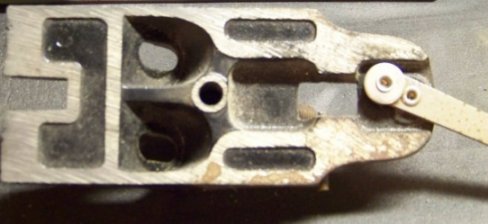
First, we need to address the tooling marks left on the top where the frog meets the blade:
Using the same method we used in part 1, we will again use the float glass and 220 grit sandpaper to GENTLY remove the tooling marks. First, we’ll put some guidelines on the frog:
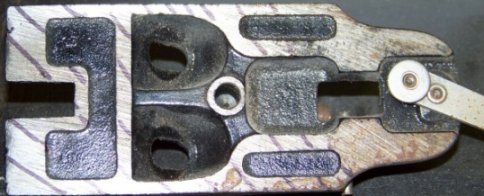
Again, being very cautious, it only takes a few minutes against our flat surface to produce a surface with most of the tooling marks removed:
Note that there’s a slight bit of tooling on the surface to the left (near the blade guide lever). It’s not perfect. On the frog, there’s very little material to work with on the mating surface for the blade, and we want to be careful not to remove too much. This should be leaps and bounds above what was there before though, and the ultimate goal is to increase the surface area where the frog meets the blade, which we have done in large quantities.
The bottom of the frog also needs to be addressed for flatness. Luckily, there wasn’t really anything out of square here, and basically, I just took a little time to remove the surface rust off of the mating surfaces with a flat file:
Your mileage may vary here, but unfortunately, there wasn’t anything to show with my plane.
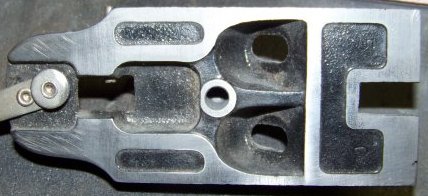
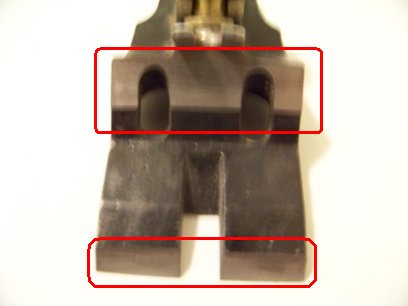
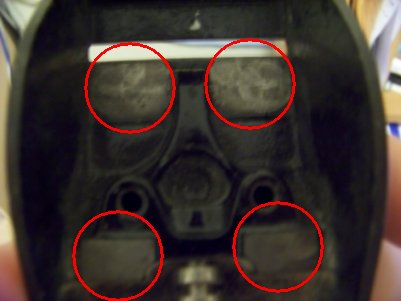
The last step we are going to address related to the frog is where it mates to the sole. There were a few tooling marks left over at the bottom at the four mating points. I marked the surface with a Sharpie on all four, and used a flat file to knock down the back surfaces. Use caution to make sure you aren’t beveling the surface, but flattening it out, or it will defeat the purpose of removing the tooling marks! For the front two mating surfaces, I used some emory cloth and a 1/2″ piece of dowel rod and just twisted the cloth back and forth until the tooling marks and Sharpie markup lines were gone. Here’s the before and after result:
Well, that’s all for truing up the frog. We now have a parallel surface between our blade and material. Next time, we will talk about how to modify our plane’s throat and chipbreaker for optimal removal of shavings so they don’t get jammed in the opening. See you then!
Related:
Refurbishing Old Hand Planes Part 1: Flattening the Sole
Refurbishing Old Hand Planes Part 3: Modifying the throat and chip breaker.
Please add a follow-up blog post on the correct way to put the frog back into the plane. Shouldn’t the plane blade be flat against the back of the mouth and also the frog? The blade would be supported equally by the mouth and the frog.