New Project Inbound
Hey folks, I’ve had a thing or two going on, but I promise an article on my new project in the next two weeks on the ethernet aware digital clock. I’ll be giving it some woodworking flare to dress it up along with some Bacon Fat Labs original mods. Stay tuned.
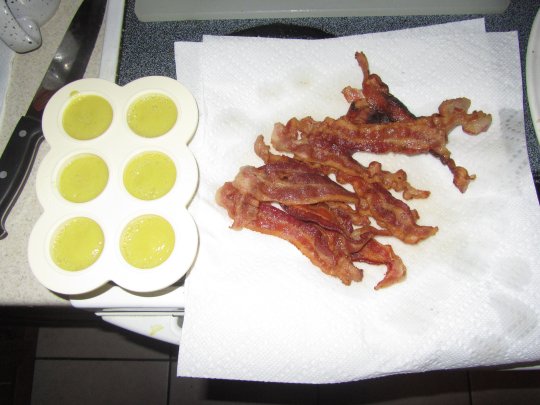
In the mean time, enjoy this picture of a pound of uncured bacon and six pieces of organic squash fashioned into a tasty baby food purée. I call it, “The Duality of Man”.

Okay, so the baby food isn’t that exciting next to the bacon. This is my life. Enjoy.
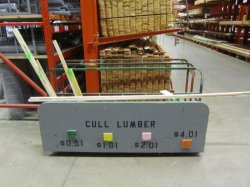
What in the world is cull lumber?
 In my previous article, I made a few references to “cull lumber”. There were a few people who asked me what in the world that was, so I thought it warranted a short entry and explanation.
cull/kəl/ – Verb: Select from a large quantity; obtain from a variety of sources.
Most lumber yards and big box stores that carry lumber have a small section, usually a rack of some sort, where they display cull lumber. Cull lumber can be any number of things, such as off-cuts from other customers who “just need 3 feet of an 8 foot board because I can’t fit it in my Ford Focus.” (I don’t know what that guy’s problem was… I’ve successfully fit thirty, yes thirty, four foot boards of 2×4 and 2×6 mixed variety in my Mazda 3, which was easy, as well as a 7 foot oak clothes rack and shelf for a closet, which was not that easy.) In that scenario, the customer pays full price for this stick of lumber that the store has cut for them, but instead of throwing it away, the store will put it in the cull lumber pile. (Read more while your bacon fries….)
Steel target stands for the Dallas Area Blogshoot, #2
Recently, I participated in the Dallas Area Blogshoot, which consists of several, errr bloggers, from the Dallas area, and some from well out of town from what I understand.
James, a best friend of mine (one of the motley crew of brothers from other mothers) and the proprietor of The Redneck Engineer blog, did a fantastic job hosting the event along with Bob S of 3 Boxes of BS. You can read the background “planning” articles of the event here and here, respectively, along with thorough recap coverage of the event on TRE’s blog here. (Just as an aside, if you haven’t checked out their blogs yet, by all means, do so. James some pretty neat stuff going on and Bob always has an insightful read handy.)
During the planning stages of the event, James ran into a dilemma: The range we attend does not have anywhere to hang steel targets, and we REALLY wanted to shoot at steel! Enter Bacon Fat Labs. I agreed to build three target stands for the steel to be placed at the 100, 200 and 300 yard mark of our range. Although there are several projects I have that need to be posted, I’ve been neglecting writing on the new blog for some time and thought this was a good first project to introduce.
OSHW Eagle symbols for schematic and silkscreen

Dewalt Powershop rebuild
I have no idea why I haven’t written about this until now, since the video have been together for almost a year now, but enjoy. Here’s build highlights from a 1960’s DeWalt Powershop that I put back into good working condition after I inherited it from my father-in-law.
The Folding@Home project, with a little VMWare. Part 2
If you linked here directly, feel free to go back and read part 1 for background on this project, located here. If you’re still with us from Part 1, Thanks!
Recently, I filled a 4 foot rolling rack with equipment. A 4 core IBM eSeries server with 2 TB of SCSI storage running ESXi is one of the main components. I always like to keep the server online for various sundry items, but it usually sits largely idle, even with two Red Hat Linux instances running on it while I am studying. This is somewhat of a waste in my opinion because the server is sitting idle with spinning fans while not doing much of anything. A wonderful solution to this is have ESXi run a guest, specifically for the folding application. If set up correctly, you can even have ESXi dedicate as much of the machine’s resources for CPU and memory as possible during downtime, and have it throttle it back when other applications are working on mission critical things. I’m looking at you, small business and enterprise owners.
The Folding@Home project, with a little VMWare. Part 1
Around this time last year, I made a post about helping the environment through a service called “Earth911”. This post isn’t about the environment, nor is it about woodworking, electronics, weather, or any of the other weird stuff you’ve come to expect from my writings. This is about helping the thing we all hold most dear in this life: ourselves. Readers in my audience who are on the techie side of things will likely have already known about this for years, but I also know I have others in my audience who are not.
Welcome, visitors from “The Daily Matt”!
Hey Everyone, thanks for visiting my site! If you linked here from “The Daily Matt” (I’m noticing A LOT of referrer traffic in my logs), let me be the first to welcome you on your arrival! I have taken the liberty of organizing all of the hand planer restoration articles into one concise source. Again, thanks for visiting, and I hope you enjoy the restoration articles!
Refurbishing Old Hand Planes Part 1: Flattening the Sole
Refurbishing Old Hand Planes Part 2: Truing the Frog
Refurbishing Old Hand Planes Part 3: Modifying the throat and chip breaker
Refurbishing Old Hand Planes Part 4: Sharpening the iron
Refurbishing Old Hand Planes Part 4: Sharpening the iron
Wow, a tremendous response from some of you who are following my restoration articles! Thank you all for your kind words and support!
For those of you just joining us, we’ve been discussing how to refurbish an old Stanley #4 hand plane that I inherited as a family heirloom. If you have missed part 1, part 2, or part 3, feel free to go back and read them. I’ll wait…..
Some of you may have noticed in part 3 that the plane iron was cutting really rough, despite having trued all of the surfaces of the plane so far. The reason is that not only was the iron not all that sharp (like yours truly at times), but the angle of the cut was not optimal. As if that weren’t bad enough, the angle was not homogeneous all the way across, and there was a small knick in the edge.
We’re gonna wanna take care of that I think……
(Read more while your bacon fries….)
Refurbishing Old Hand Planes Part 3: Modifying the throat and chip breaker.
For those following along, welcome back! For those of you just joining us, we’ve been talking about how to restore an old Stanley #4 hand plane. If you’d like to catch up, feel free to check out part 1 and part 2 beforehand.
We’ve got our sole flattened and our frog is true, and now it’s a good time to address tweaking a few of the components that deal with chip removal: the plane throat, and the chip breaker.
